
Showing posts with label Websites. Show all posts
Showing posts with label Websites. Show all posts
Wiksi is a extremely clean responsive magazine WordPress theme created using the latest HTML5 and CSS3 techniques. It is highly customizable and extremely user-friendly, provides a wide range of options with a flexible foundation that adopts your website resolution to smartphone devices, desktops and any other viewing environment. Easy to setup, enhanced with Theme Options Panel, a beautiful color combination in the homepage, attractive navigation, with excellent spacing while retaining its responsive abilities. This combination makes creating content extremely easy.


Theme Features
- Clean, Modern and Responsive Design.
- 3 Column Layout
- Advanced Theme Options Panel
- 8 Ready To Use Skins
- Unlimited Color Schemes
- Responsive Slider
- SEO Optimized
- Integrated Social Media
- Google Map
- 24 Custom Widgets
- Carousel Posts Widget
- Weather Widget
- Comments With Avatar
- Facebook Like Widget
- Google + Widget
- Flicker Photos Widget
- Popular Posts
- Popular Posts Text
- Recent Posts
- Recent Posts Text
- Recnet Reviews Widget
- RSS Email Subscription
- Social Icons Widget
- Tabs Widget
- Embed Video Widget
- Login Widget
- About Widget
- Contact Us Widget
- 125×125 Ads Widgets
- 120×600 Ads Widget
- 180×100 Ads Widget
- 260×120 Ads Widget
- 300×250 Ad Widget
- 300×600 Ad Widget
- 4 Post Formats
- Audio
- Video
- Image
- Gallery
- 4 Page Templates
- Blog Page
- Archives Page
- Full Width Page
- Contact Page with Map
- Translation Ready
- Custom Favicon
- Custom Logo
- Apple Touch Icon
- Fancybox
- Ads ready
- Shortcodes
- Youtube
- Vimeo
- Soundclound
- Color Buttons
- Dropcap
- Highlight
- Checklist
- Crosslist
- Tabs
- Toggle
- Google Map
- One Half Column
- One Third Column
- Two Third Column
- One Fourth Column
- Three Fourth Column
- Grey Box
- Yellow Box
- Red Box
- Blue Box
- Green Box
- Audio/Video Featured Image altenative
- Breaking News
- Flexslider
- Tracking Codes
- Social Icon Resizer
- Widgets Ready sidebar and footer
- Cross Browser Compatible
- Extensive Documentation
24/7 Support

We provide dedicated after purchase support. So if you need any help related to the theme, fell free to contact us. Follow this link http://piethemes.net/support/, send us an email and we’ll be more than glad to help you.
If you are a newbie Blogger or Webmaster and if you are a applying for adsense to monetize your site, then you might have faced the situation where Google asks you to wait for atleast six months to qualify for your adsense account and get approved to show ad slots in your site. 6 Months is too much a long wait and there is no need to lose adsense dollars waiting six months.
How to Get Approved by Google Adsense without for 6 (six) months – Make your Adsense Account Active:
What we found is that Google is not nearly as picky as they make themselves sound to be. The trick is to make your one site or blog in such a way, that you are just providing good content. Don’t worry, once you’re approved you can use that code wherever you want – so put it on other sites. But for the purposes of getting approved, try to limit to just content, content and more content!
There are 3 Main elements that you should focus on when getting Approved by Google Adsense:
1. Site look and feel – Make sure to atleast have a presentable Blog– even if it is just a few tables and a solid background color. Avoid using tacky backgrounds or unprofessional color contrasts.
2. Content – The most important – Google believes in content. If you try to get a website with just a few pages approved, I don’t think you will have any luck. You need to have at least 15-20 pages, preferably, 15-20 pages of Articles/Post Pages, aka content.
3. Traffic – Many experts say that Google Adsense team looks to see what kind of traffic you have and that they do not approve new sites with no traffic. My experience says that these experts are FULL of it. BUT, just to be safe, before you submit your site for approval – try to get your site some traffic.
Here are useful tips you need to make the entire Adsense Approval process Easier and Quicker:
 |
| Photo Source: http://techgyo.com |
1. Get content from article directories – just put those articles in your site, getting 15-20 is easy.
2. Before you submit your site for approval, post at some forums with your website’s link in the signature file – this will help you get some immediate traffic.
3. Make a very simple website with 15-20 articles, a contact us page, a privacy policy and the typical disclaimer.
Some Must Have Pages in your Blog While Getting Approved By Adsense:
Well there are some must have pages in you blog which Google would necessarily want to see while approving your Blog Site for the Adsense Program. Plus you should have the links to these pages in the Home Page of your Blog. They Are…
- Privacy Policy ( Compulsory for Adsense )
- About Page (This is Optional but effective )
- Contact Us – (No one Likes Anonymous Bloggers – Optional )
That’s it – you are ready to get approved for Google Adsense. I know this sound too easy, but trust me, it is. And remember, if you do not get approved, you can always fix things and try again.
Post Source Link: http://www.snaphow.com/1323/how-to-get-approved-by-adsense-not-wait-6-months-adsense-account-not-active-yet
You will find many resources for designers and developers and of course you wouldn’t always know which one is the best to put to use. That’s where we come in. We have compiled this particular list of 15 fresh resources for developers and designers in order to help you out. These resources have been compiled after scouring the internet for you and these are the best of the best. We will keep updating you regarding more resources as we find them. We hope this list proves helpful and you enjoy the read. Your feedback is always welcome.
Also Read : 30 Fresh Useful Resources for Developers and Designers
COLOR SCHEMES


This particular tool is a jQuery plugin and it helps you to add accented characters very easily. You might already be familiar with the concept of long press if you use android devices because they use that function in for almost every command. If you hold down the ‘a’ or ‘e’ key, additional characters popup (as can also be seen in the picture). This can help you save a lot of time and it also makes it easier for you to find ‘special’ characters.
LAYOUT ICONS


Also Read : 30 Fresh Useful Resources for Developers and Designers
COLOR SCHEMES
If you guys are programmers are using either Sublime Text 2 or Textmate for editing code then you might want to consider this particular tool called color schemes. This package is created by Dayle Rees and I am sure looking at the picture gives you the picture of what this package does. You have around 30 different color schemes that you can use to your liking. It does make things easier.
This particular tool is a jQuery plugin and it helps you to add accented characters very easily. You might already be familiar with the concept of long press if you use android devices because they use that function in for almost every command. If you hold down the ‘a’ or ‘e’ key, additional characters popup (as can also be seen in the picture). This can help you save a lot of time and it also makes it easier for you to find ‘special’ characters.
LAYOUT ICONS
There are many different websites that offer you different sets of icons that might include social media icons or even general user-interface icons but this is a little different. This package is created by Ales Nesetril and these icons represent the layout of the web. I am pretty sure you guys can make sense of that just by looking at the icons. These icons are bound to come in handy if you are building a content management system.
We are pretty sure that you are aware of the new features of CSS3 and their application in web animation. Adobe edge was recently introduced and with it comes Adobe Edge Animate. The software is essentially similar to Adobe Flash although the only difference is that it creates animations for the web and you know exactly how easy Adobe makes things so you can pretty much say that web animation just got easier. It is still free so you might want to get your hands on it soon.
Have you ever visited the website called Reddit? If so then it’s all good but if you have not then you might want to visit and see if it appeals to you or not? Well, if it does than the good news is that you can build a similar website using telescope. This real-time social news framework is built upon Meteor which is equipped with many different features including but not limited to real-time updating, invite-only access, notification and e-mail authentication.
Just reading the name we are pretty sure you guess as to what the functionality might be, not to mention looking at the picture. It is for designers to draw their ideas as soon as it hits their heads. There are a few typography elements you can use and general shape to give your idea an outline. You can create several documents and thereby adjust their width and height etc.
We are certain that you understand exactly how important and used scalable vector graphics are when it comes to websites for which purpose there are many different editors available for you to edit your scalable vector graphics. One such tool is method draw. The best part about this application is that is web-based so you don’t need to download and install it. The best part about this tool is that it is free.
This particular application is a JavaScript library which helps you to build web charts that are built upon D3.js. These charts are formed with HTML, SVG (Scalable Vector Graphics) and CSS. As of now, there are two types of charts available for you to choose from; bar and line graph. You can very easily customize these two graphs using CSS and of course that all depends upon you.
The use of computers to check the e-mail is very minimum according to statistics and everyday more and more people are shifting to the mobile phone medium in order to check their e-mails. For you to check your e-mails on your phone it is imperative for you to receive them too. You can use these responsive e-mail templates and there’s five different ones you can choose from.
It is a fact that creating a responsive e-mail might prove to be a bit challenging but it still is nothing compared to creating a responsive table. It is very tricky as we are sure you must know. There are many solutions available to make the process wee bit simpler one of which is Footable. It is a jQuery plugin that should make you tables responsive and too a bit easily.
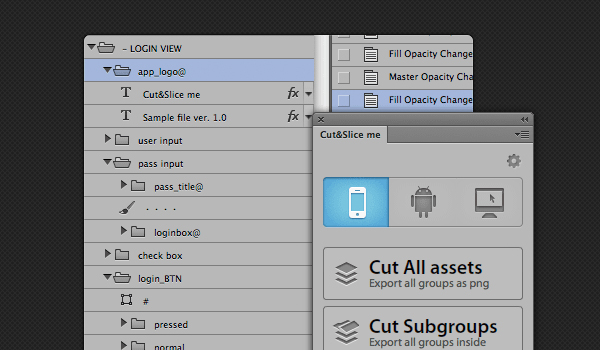
Cut and Slice is a free Photoshop plugin which should allow you to slice your Photoshop layers in order for you to use them in web and it should be able to do that in seconds. It is free but it is only available for CS6 so the rest of you might have to wait. You guys are aware of how difficult and time-taking the job of slicing layers for web can be and especially so if you have millions of them.
If you are using jQuery, folding effect shouldn’t be that big of a deal to you when it comes to web development. You have many free plugins available to you that are able to create such visuals so what is different with PFold? Well, you know how you fold the paper and unfold it back to its original straight or change the shape and everything? PFold sort of does the same thing. You can even aim the fold direction to wherever you want so it’s more interesting.
If you have visited the website called Pinterest then you are sure to know that they present their information in the layout of a grid. For those of you who don’t know, Pinterest has to do with social media. Anyway, using this little tool you can create similar grid layouts. This plugin is actually responsive so it makes the job way better than your average tools.
There are many different functions introduced with CSS3 and even though they are awesome, for example the transformation and transition function; they tend to get a little complex. In order to ease things a little, Adem Ilter has created this tool called Liffect. It adds unbelievably cool effects including Star Wars effects. Can it get more awesome then Star Wars? I guess not.
This is a very light jQuery puglin which helps you create 3D dropdown effect. The name should make it clear that the effect actually looks like Makisu it is folds down. For those of you who don’t know, Makisu is a mat which is woven from bamboo and cotton string which is used in food preparation. It is usually how sushi is rolled. The 3D effects offered by Makisu are built upon CSS 3D transformation so you should only be able to see these effects on modern updated browsers.
This post is adopted from:
Post Source: Reference Link
Welcome. If you want to make a website and you don't know how to make it, then you have come to the right place.!
Here i explain how to create a website. And i also explain you :
1: How to get your own domain name (e.g www.yourdomain.com), and
2: How to host your website.
Need a Free Website ?
If you need a free website and have not time to learn the technical stuff ?? then you must go for blogger, where you can make a free website (blog) and also blogger provide you with free hosting and free domain name (e.g www.yourname.blogspot.com). But you can also purchase your own domain name although form blogger or from other domain name provider websites. ( Godaddy is highly recommended.) and this is a cheapest ad easiest way to make a website.
However free Web hosting websites often have some limitations.
see this article: Free Web Hosting
Click here : How to make a Website (Blog) In Two Steps
Website creation Process:
1.Register Domain Name. 2.Get A Web Host. 3.Build Your Website
You have to register your A website host company that You can build website yourself
domain name. For doing host your website to be viewed or can build it from a
this you have to pay for it. by rest of the world. professional (expert).
e.g www.yourname.com. Different hosting companies
are offering different plans.
Step 1: Register A Domain Name
First of all you have to register a domain name. In other words, you have to purchase it for domain names provider companies.
 The domain is looks like this:
e.g www.yourdomain.com
Different domains are available like .Com .Net .Me .Co .Ca .Org and etc. You have to choose which domain you want and whether your desired domain name is available or is already taken. This will information is also provided you from website company from you are purchasing your domain name. Well! this is not a problem.
Step 2: Get A Web Host
 After registering a domain name the second step is to host your website. Many domain registering companies also provide hosting service.
Care should to be taken when choosing a hosting company.So you have to choose a host company very carefully. A good hosting company is that which provide excellent support 24/7 and provide excellent website builder facility.
Step 3: Build Your Website
This is easy and difficult provided you have some knowledge or not.
The very easiest way to build a website is to use your host's online website builder. I recommend you this mean. see more on How to Build Your Website
Or if you want more sophisticated and unique website then you should build your website from experts..
Save Your Money Tips:
Just go for Blogger's Blog (the google's host provider). Which provide completely and absolutly free hosting. You have no need to purchase domain rather you will be provided by a sub-domain which is completely free. You can make your blog completely look like a website rather just look like a blog. You just have to upload a website look template. You can choose website look templates from:
Free Website Look Blogger Blog Templates
Here i explain how to create a website. And i also explain you :
1: How to get your own domain name (e.g www.yourdomain.com), and
2: How to host your website.
Need a Free Website ?
If you need a free website and have not time to learn the technical stuff ?? then you must go for blogger, where you can make a free website (blog) and also blogger provide you with free hosting and free domain name (e.g www.yourname.blogspot.com). But you can also purchase your own domain name although form blogger or from other domain name provider websites. ( Godaddy is highly recommended.) and this is a cheapest ad easiest way to make a website.
However free Web hosting websites often have some limitations.
see this article: Free Web Hosting
Click here : How to make a Website (Blog) In Two Steps
Website creation Process:
1.Register Domain Name. 2.Get A Web Host. 3.Build Your Website
You have to register your A website host company that You can build website yourself
domain name. For doing host your website to be viewed or can build it from a
this you have to pay for it. by rest of the world. professional (expert).
e.g www.yourname.com. Different hosting companies
are offering different plans.
Step 1: Register A Domain Name
e.g www.yourdomain.com
Different domains are available like .Com .Net .Me .Co .Ca .Org and etc. You have to choose which domain you want and whether your desired domain name is available or is already taken. This will information is also provided you from website company from you are purchasing your domain name. Well! this is not a problem.
Step 2: Get A Web Host
Care should to be taken when choosing a hosting company.So you have to choose a host company very carefully. A good hosting company is that which provide excellent support 24/7 and provide excellent website builder facility.
Step 3: Build Your Website
This is easy and difficult provided you have some knowledge or not.
The very easiest way to build a website is to use your host's online website builder. I recommend you this mean. see more on How to Build Your Website
Or if you want more sophisticated and unique website then you should build your website from experts..
Save Your Money Tips:
Just go for Blogger's Blog (the google's host provider). Which provide completely and absolutly free hosting. You have no need to purchase domain rather you will be provided by a sub-domain which is completely free. You can make your blog completely look like a website rather just look like a blog. You just have to upload a website look template. You can choose website look templates from:
Free Website Look Blogger Blog Templates
Related Articles:

Limited Space:
Offer very limited amount of space storage for your blog or website. They usually provide from range of 10 Mb to 1000 Mb. Which is much limited amount of storage.
Limited Bandwidth:
They often provide you with very limited bandwidth that you can use and please be sure to check rules for specific contents. Some free web host provider also limit you on uploading no or minimum number of videos that you can host. Most provider only offer 1 GB of Bandwidth.
Advertising On Your Website:
Mostly free host provider advertise on your website that you cannot control and cannot ask them not to advertise on my website. Obviously they are providing you free service because of this.
Your Domain Name:
Some providers also gave you this service that you can use your own domain name rather then own. Blogger is one of them. which provide you this service. You can purchase your own domain name either from third party or from those you are currently hosting.
Free emails:
This is very beneficial if a provider also provide you a free emails but this will be only in case where you are hosting your own domain name.
Which Free Host Provider Should I Choose?
well i only recommend you Blogger . Because Blogger provide you the most services which other free providers don't. So make your website (Blog) on blogger and enjoy its free services.
Related Articles:
If you have your own domain name and a host provider then next step is to build a website which i explain you that how you can do this.
 First you need to decide which type of website you want e.g News/information, product, business or persona. Once you decided which type of website you want to build the next step will be you should have to be familiar with:
- Design Basics
- Learning HTML
- Learning CSS
- Web Page Editors
Design Basics:
You have to be familiar with space, formats, layouts, handle fonts and colours, and puts all these in a format that puts your message across.
Learning HTML & CSS:
An online classes of learning HTML & CSS is an easy way to start learning HTML & CSS. This class lets you to learn about HTML ad CSS, and will covers all aspects related to this field and make you a litle expert to build your own website through HTML or CSS.
Short courses are also available.
Web Page Editor:
Well this is so called difficult and hard to find HTML Editor. I had evaluated many HTML editors for Windows, MAC and Linux as well as some online editors.
Now at the end, after doing all the above, the next step is to:
Publish your website:
Publishing your website so it is open to the public and people from rest of world can see your website.
And can check what is you offering to public.
Promote Your Website:
After publishing the website you have to promote your website so people gets know about your website. A website can be promoted through many social channels and also by yourself.
Social Media:
Promote your website through social medias like Facebook, Google+, Twitter, Yahoo etc although by making pages or through advertisements on Internet.
Maintain Your Website:
You must regularly update your website and maintain this regularly. If you are getting error on your web page then contact to your host provider.
Related articles:
Every new user of a blog or a website, even mature website holder have a problem of very low traffic on their blog or website. But now you don't have to worry about this. Here is a completely 100% free of cost solution (known as Search Engine Optimization SEO) for this major problem. But before i come to the main topic(Free SEO solution),

i want to tell you about some major mistakes:
Use of :
1: Copy & paste Copyright material.
2: Wrong Keyword.
3: Default permalink.
4: Worthless content.
Now i tell you how to free SEO of your blog or website and increase traffic which no one can tell you about this. So let's start it.

i want to tell you about some major mistakes:
Use of :
1: Copy & paste Copyright material.
2: Wrong Keyword.
3: Default permalink.
4: Worthless content.
Now i tell you how to free SEO of your blog or website and increase traffic which no one can tell you about this. So let's start it.
Unique Contents
- Use contents that are not just copied and pasted this will be violation of Copyright act and you can be sued by doing this. Develop your skills to write a material which has some worth. You can assist your work by wikipedia or other websites which provide free information. Shortly do not use Copyright material in your posts.
- You can check your material by use of The Plagiarism Checker .
Keywords
- Use keyword which attract sufficient traffic and open monthly for at least 20,000 times. Do not use keywords with high competition as you are a new and now make this as your permalink.
- You can select a keyword by the use of Keyword Tool .
Social Media
Directories
- List you blog or website on Google, Yahoo, Dmoz, Bing and other directories.
- Make sure you have done this.
Permalinks
- Select keyword related to your topic check it with Keyword Tool and then set it as your pemalink.
Once you done all the above things you will get more traffic on your blog or website, this is what a SEO.
If you have any problem regarding this or you want to ask some thing more about this or any thing not related to this topic? then comment us.
Find us on Facebook .
You can create a blog for free on blogger, wordpress, skyblog.. Here i show you how can you make a free blog on Blogger . But before you can make a blog you have to make a Google Account. Click on this: Make a Google Account (If you already have a Google Account then you don't need to do this).
Make Blog in just two steps:
Step 1: Click on this Link (to open blogger website direct to create a blog page)
Step 2: Enter the details.
1: Your desired title
2: Your desired blogger address
3: Select any Template
4: Click on Create Blog!

Awesome Professional Blogger Templates .
Make Blog in just two steps:
Step 1: Click on this Link (to open blogger website direct to create a blog page)
Step 2: Enter the details.
1: Your desired title
2: Your desired blogger address
3: Select any Template
4: Click on Create Blog!

That's it. Thank You.
Please Like us on Facebook .
Awesome Professional Blogger Templates .
If your Blog is hosted by blogger then definately may not be happy with common templates provided by blogger. If you want to give your blog professional look then you have to change your blog template. Perform just 2 Steps:
Step 1: First you need to change your template but before this you have to download your dreamy template from here: Free Blogger Templates
Step 2: After selecting and downloading your desired template in step 1, you have to upload this template to your present blog.
So follow these steps:
1: Log in to Blogger (you are at Dashboard)
2: Click on the Template button.

3: Click on Backups/Restore button.

4: Click on Choose File (upload template downloaded in step 1).

Step 1: First you need to change your template but before this you have to download your dreamy template from here: Free Blogger Templates
Step 2: After selecting and downloading your desired template in step 1, you have to upload this template to your present blog.
So follow these steps:
1: Log in to Blogger (you are at Dashboard)
2: Click on the Template button.
3: Click on Backups/Restore button.
4: Click on Choose File (upload template downloaded in step 1).
That's it. Now you have a same blog but with complete new look.Thank You
If you like this post then Like us on Facebook.


